
Using with an IPP Connection
Operations required to use this function (For administrators)
Configure the IPP operating environment.
How to configure the setting is explained using Web Connection. For details, refer to Here.
Adding a printer
Use the following procedure to add a printer via the IPP connection.
Select [System Preferences...] in the Apple menu.
Click the [Network] icon.
The Ethernet setting window appears.
Select [Ethernet], then click [Advanced...].
Click the [TCP/IP] tab.
Configure the settings including the IP address and subnet mask according to the settings of the network to which the computer is connected.
Click [Apply], then click the close button at the top left corner of the window.
Then, add the printer to the computer.
Select [System Preferences...] in the Apple menu.
Click the [Printer & Scanner] icon.
In Mac OS X 10.7/10.8, click the [Print & Scan] icon.
Click [+] in the lower left of the screen.
Select [Add Other Printer or Scanner...] or [Add Printer or Scanner...] in the list that is displayed by clicking [+].
[Printer Browser] appears.
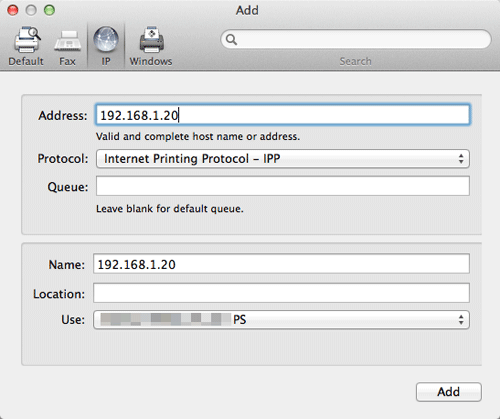
Click [IP] or [IP Printer].
In [Protocol:], select [IPP(Internet Printing Protocol)].
In [Address:], enter the IP address for the machine. In [Queue:], enter "ipp".
The printer driver for the machine specified with the IP address is displayed in [Print Using:].
When the printer driver is displayed, go to Step 14.
When the printer driver is not correctly displayed, go to Step 13.
Manually select the printer driver.
In Mac OS X 10.9/10.10/10.11, select [Select Software...] from [Use:], then click the driver of the desired printer from the list that is displayed in another window.
In Mac OS X 10.7/10.8, select [Select Printer Software...] from [Use:], then click the driver of the desired printer from the list that is displayed in another window.
Click [Add].
This completes the addition process of the printer. Then, proceed to the [Installable Options] window to configure the optional environment for this machine. For details, refer to Here.